Creating and Ordering Business Cards
Template Selection
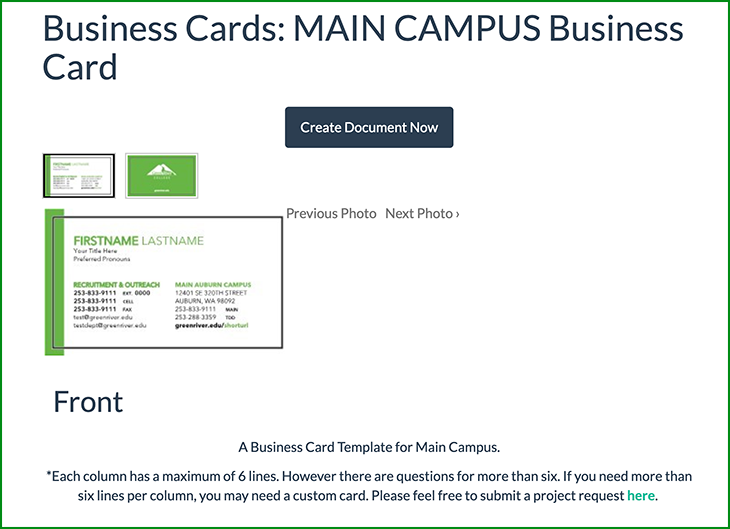
Select the “Business Cards” document type on the “Create a Document” page. You will be taken to a page that displays all campus business cards templates. Select the card template that is best suited to your needs. If you have a specialized business card but don't see a template for it, please submit a project request and we will do our best to accommodate your needs.
In this example, we'll create a Main Campus Business Card.
Selecting that template brings you to a description and preview of the card's layout. If this looks correct, click the “Create Document Now” Button.

Customizing Your Business Card
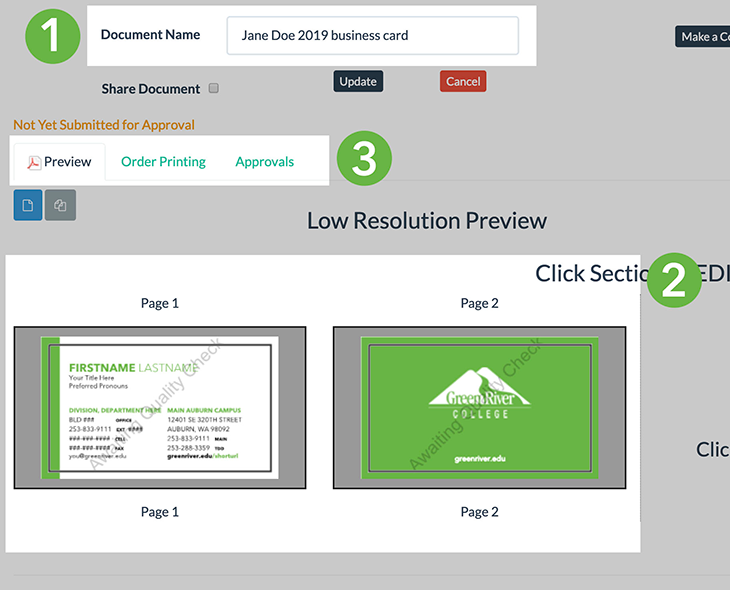
Begin customizing your card. Here you will find three very important areas:
- The Document Name: This is where you name your document. The system will automatically prompt you to fill this out as soon as you arrive at the page. We strongly recommend using brief, descriptive names like “First name Last name 2019 business card.” Click the Update button.
- Low Resolution Preview: A visual preview of your document and where you click to customize its different sections.
- A series of tabs next to the “Preview” tab.

Design Page
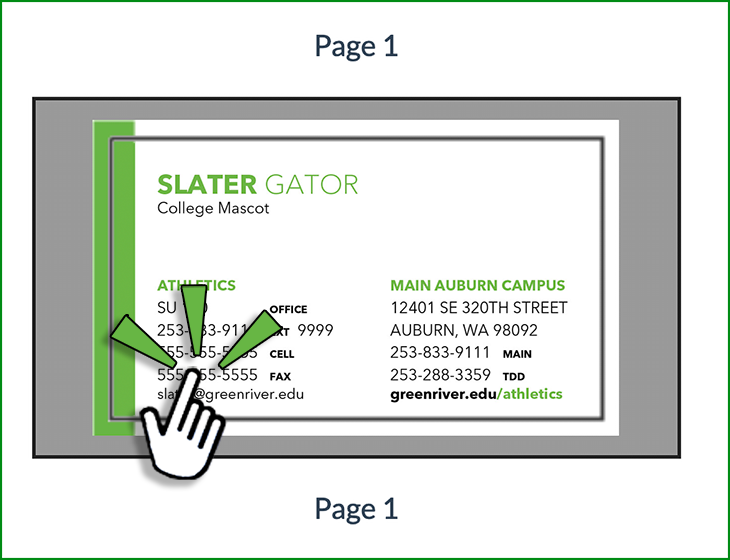
Business cards have three editable sections on the front. To edit any section, just click on it.

Clicking on any editable area will bring up a series of fields on the right side of the page for you to change with your own information. Once each field is filled out, click the “Save” button and the preview will update with the information you entered.
Tip: Notice how your cursor changes from an arrow to a pointing finger when you hover over anything editable. This is true across all document types.
Once all of the editable fields have been updated with your information, you can click the “Full Size/Low Res PDF” button on the right half of the page to open up new browser tab with a preview PDF to get a better look at your card.
Tip: For business cards, all fields have a limited number of characters allowed and a limited number of lines in each column. If any of your information requires more than the character or line allotment, you may need a custom card. For custom cards, please submit a College Relations Project Request.
How to Get and Assign Approvals
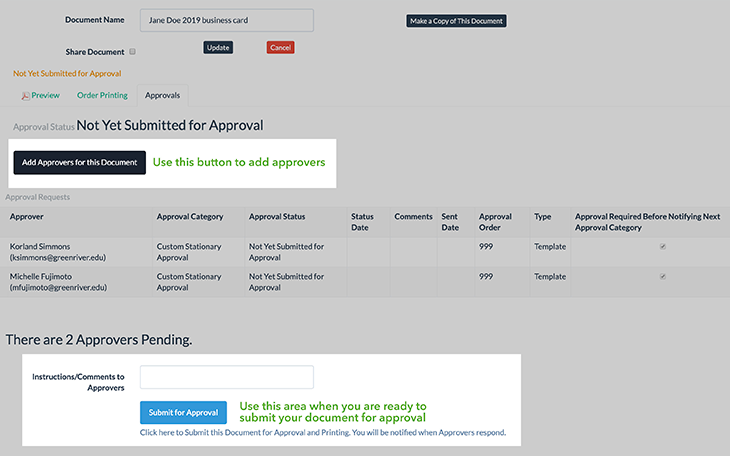
When you are satisfied that everything looks correct, it's time to submit your card for approval. Start this by clicking on the “Approvals” tab.

Design Page » “Approval” Tab
By default, there are two primary approvals that all business cards need:
- Human Resources: to verify eligibility to print business cards, position title and department name.
- Creative Services: to proof-read and check for extra spaces and characters.
If you are submitting a printing order for others in your area, you may wish to add their name and email address to the approval chain to check their information for accuracy. Simply click the “Add Approvers for this Document” button on the left half of the page.
Once you are ready, click the “Submit for Approval” button at the bottom of the page. This will generate a confirmation page and send notifications to the email accounts of all the approvers.
If an approver finds errors in the card, you will receive an email containing a link back to the card design screen. From here you can change the incorrect information.
Re-submit the card for approval just like you did before. This process can be repeated as many times as needed until everything is correct.
Your card is ready to print when each approver approves your card and you have received an email notification.

Order Prints
Learn how to submit a print order using your finalized document.